Exporting large volumes of data from NVECTA used to mean one big CSV with a system-generated name, always delivered as a compressed archive. You renamed files by hand and extracted every archive before you could use the data. NVECTA now lets you name export files with dynamic variables, split an export into batches of a fixed size, and choose whether to receive the output as a compressed archive or as a plain file, so every export arrives ready to file, open and load into your downstream systems.
How to use it
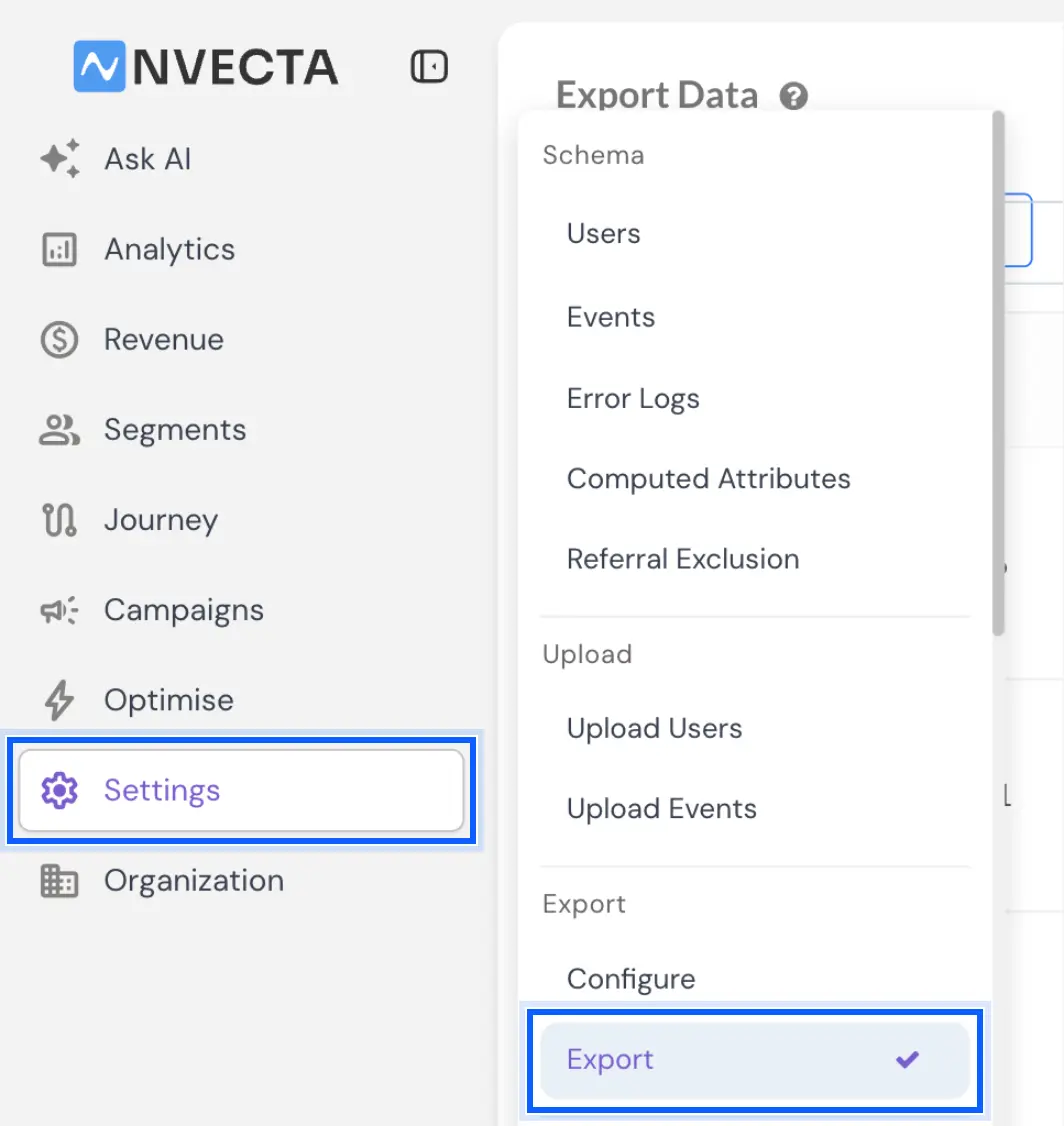
Go to Settings → Export and click Create New Export Data.
In the Create Export Data window, choose what to export (Event, User, Segment or Push Subscribers), the Export Frequency, the Export Format and the date range.
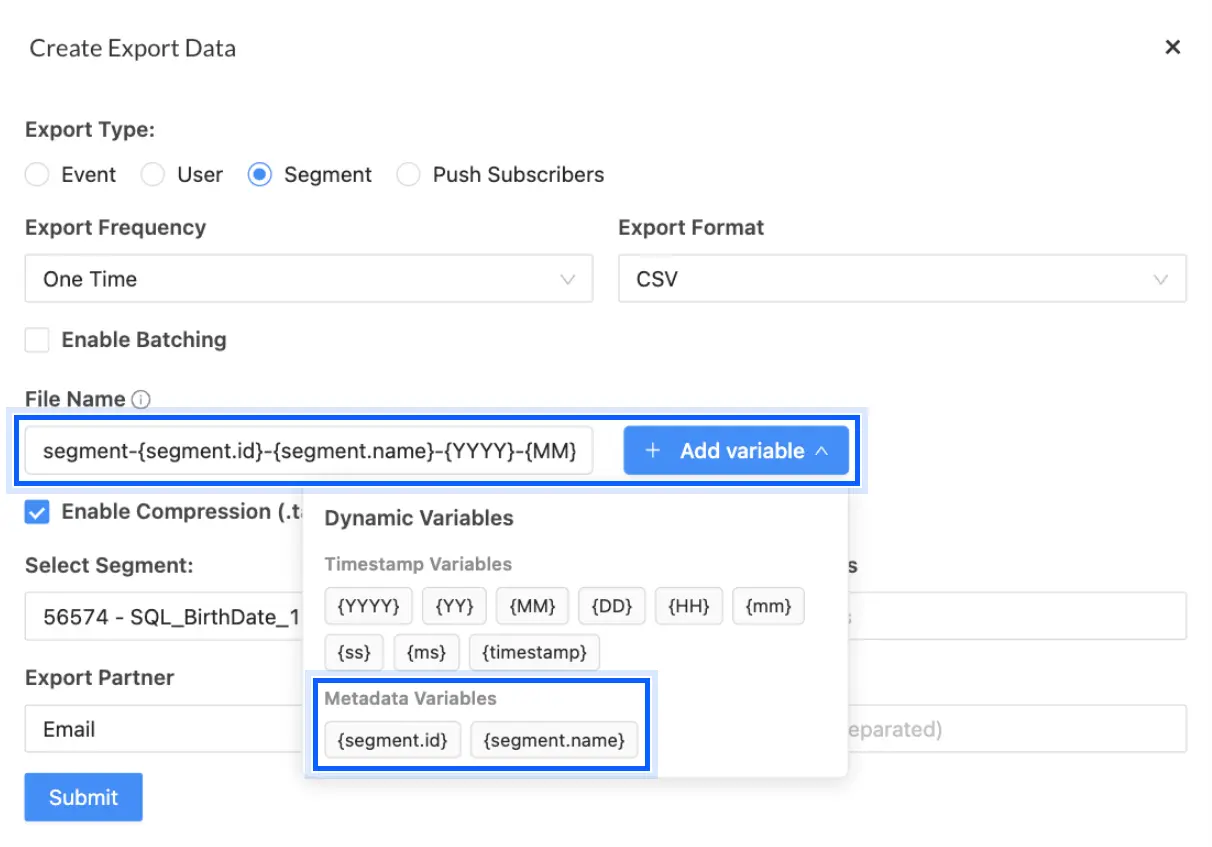
Name your files. Type a name in File Name and/or click + Add variable to insert dynamic values. The Dynamic Variables panel offers:
- Timestamp Variables: {YYYY}, {YY}, {MM}, {DD}, {HH}, {mm}, {ss}, {ms} and {timestamp}
- Metadata Variables: {segment.id} and {segment.name}, shown when you export a segment
- Batching Variables: {batch_no}, shown when batching is enabled
For example, segment-{segment.id}-{segment.name}-{YYYY}-{MM}-{DD} names the file after the segment and the date. File Name is optional for a regular export, and NVECTA uses its standard file name when you leave it empty. Once you enable batching, File Name along with {batch_no} variable becomes mandatory.
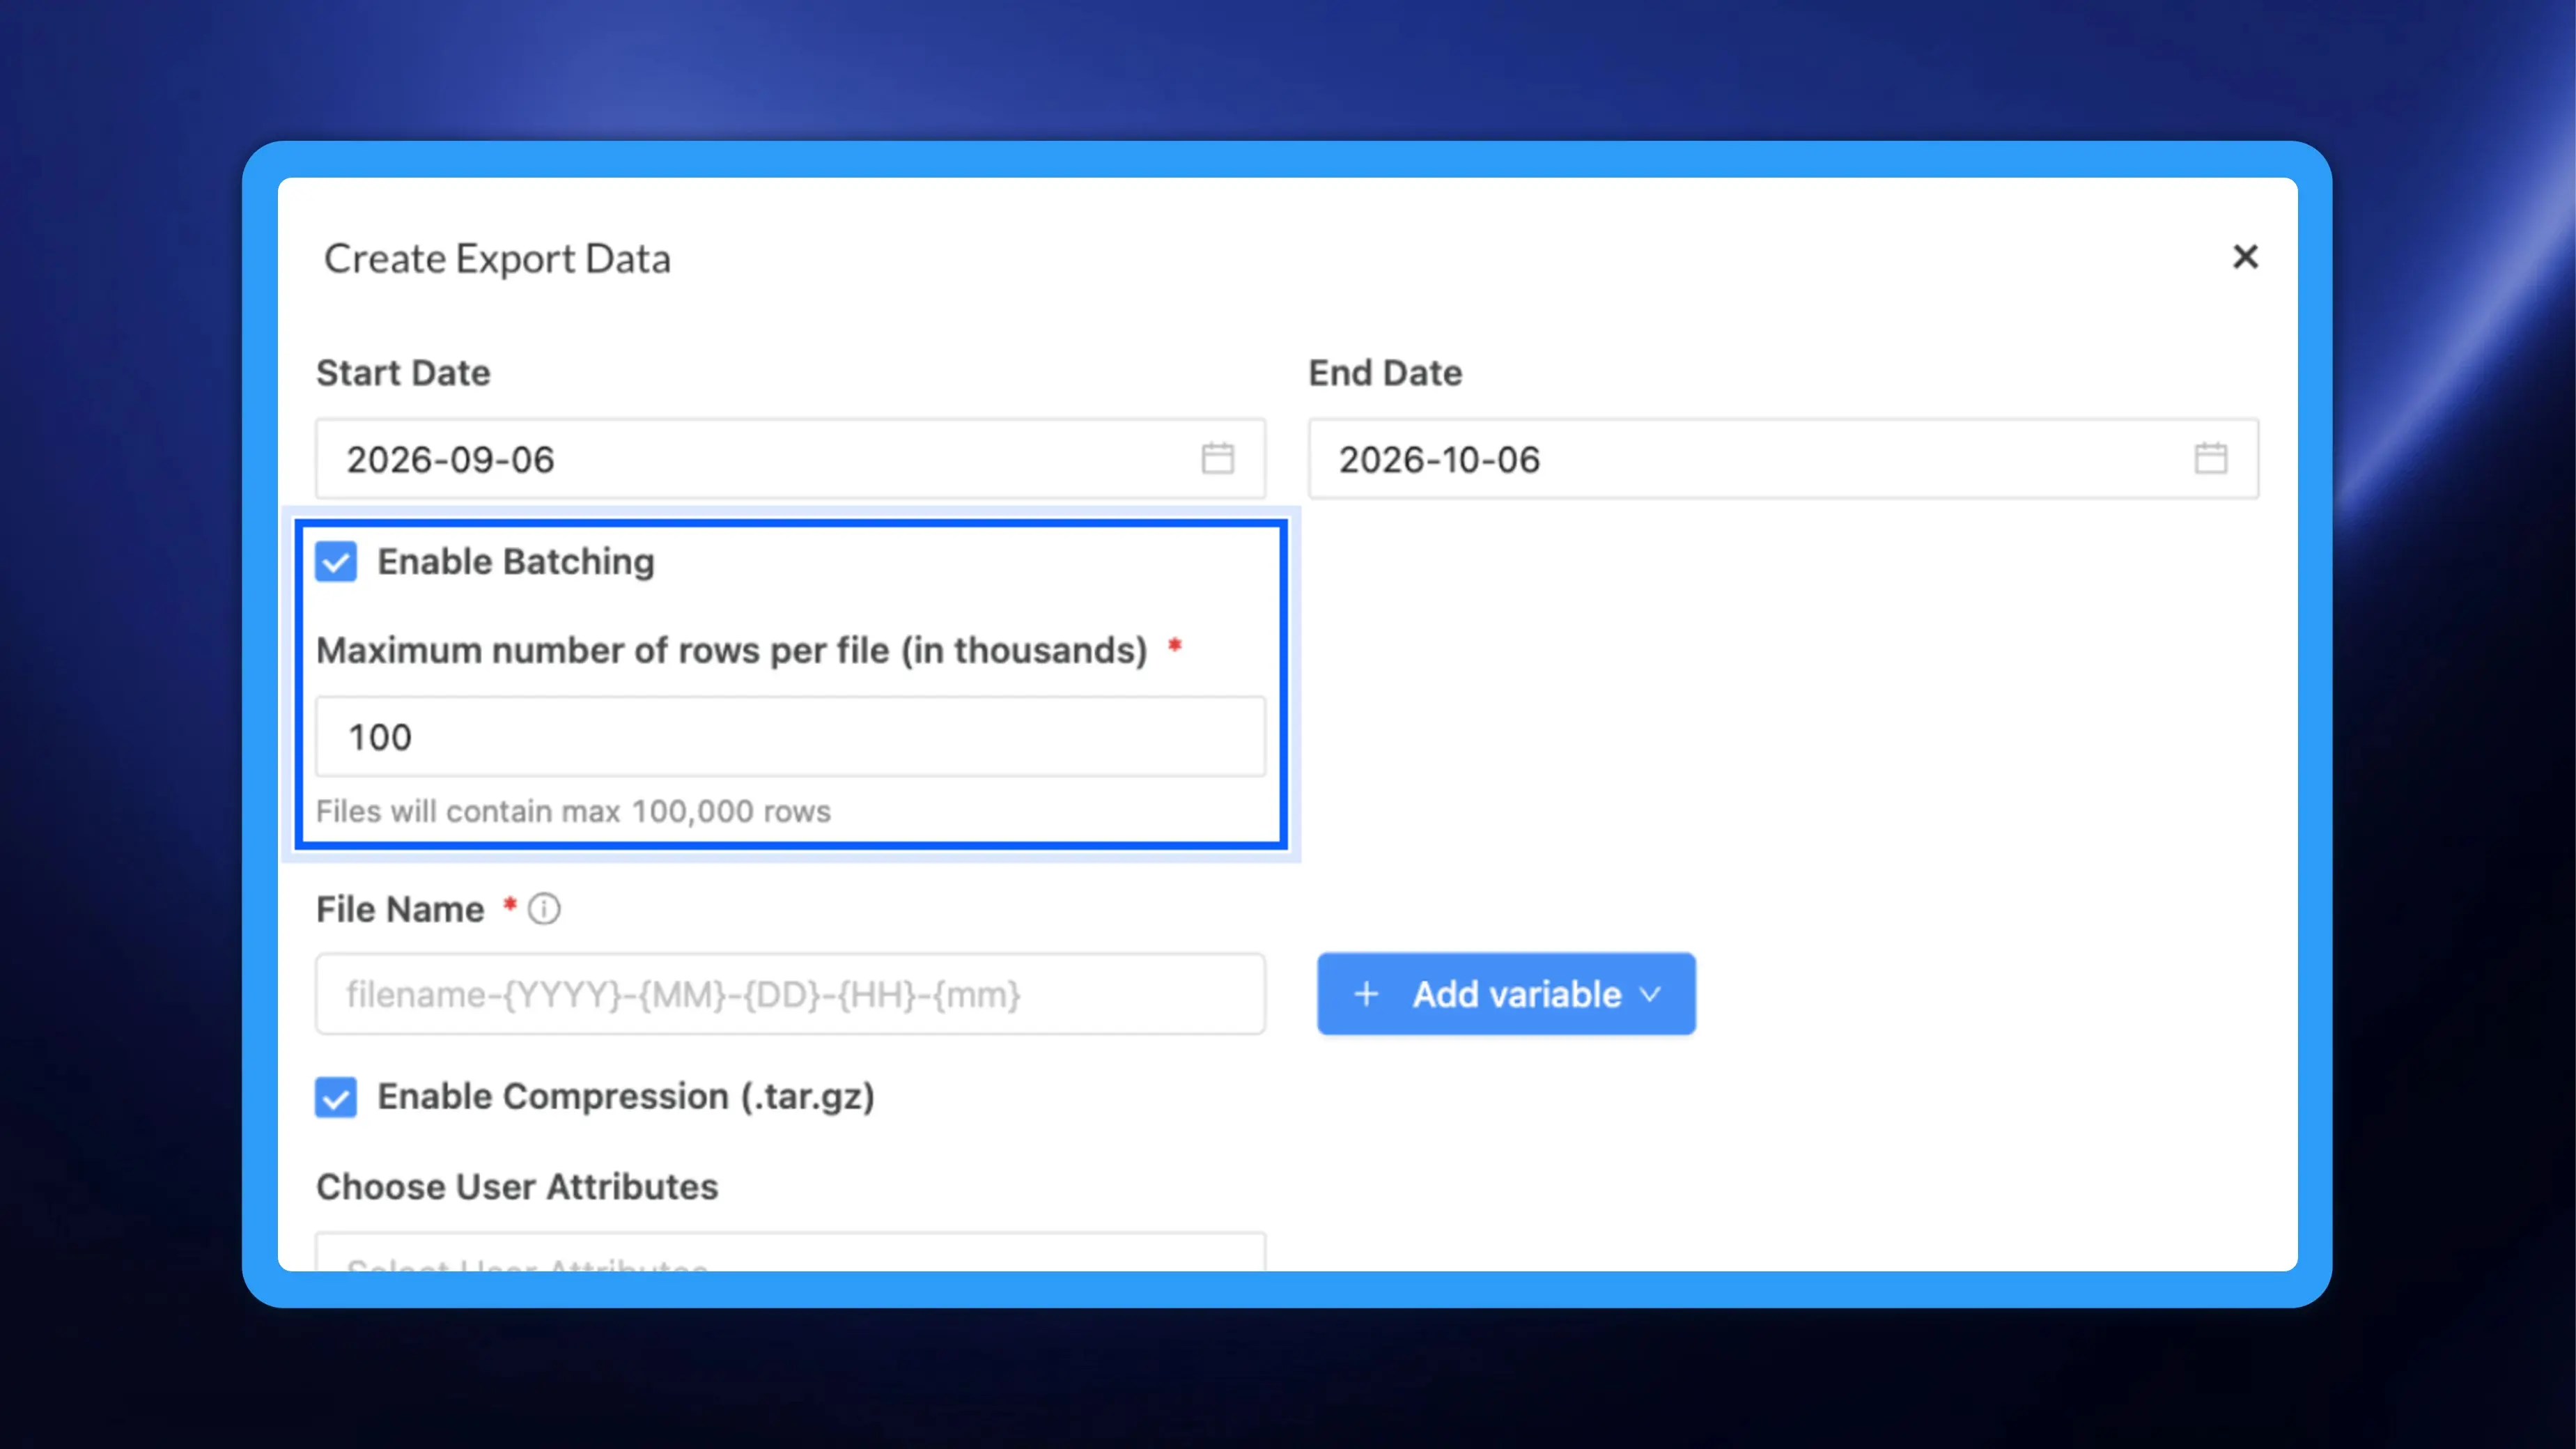
Split large exports into batches. Select Enable Batching and enter the Maximum number of rows per file (in thousands). A value of 100 caps each file at 100,000 rows, as the hint under the field confirms, so a one-million-row export arrives as 10 files. Add {batch_no} variable (with batching enabled, adding batch no. is mandatory) to the file name to number the files in sequence.
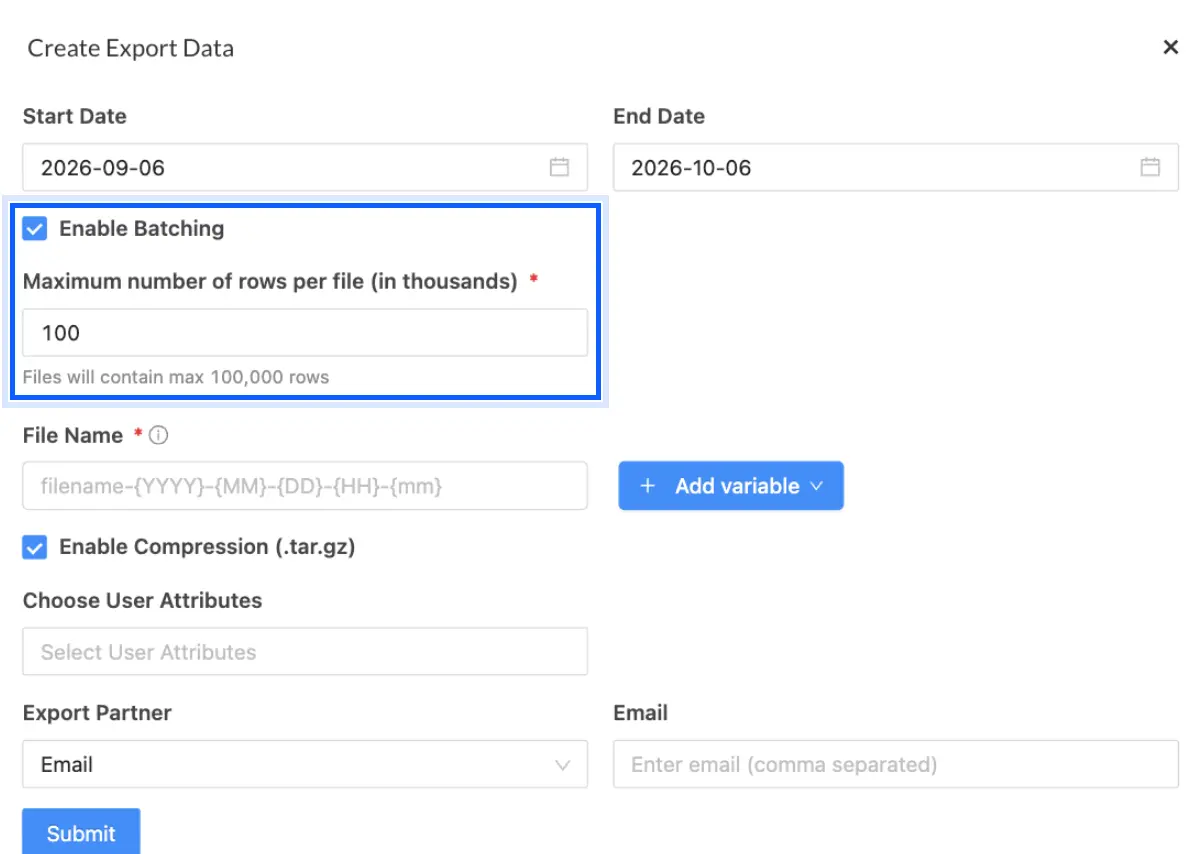
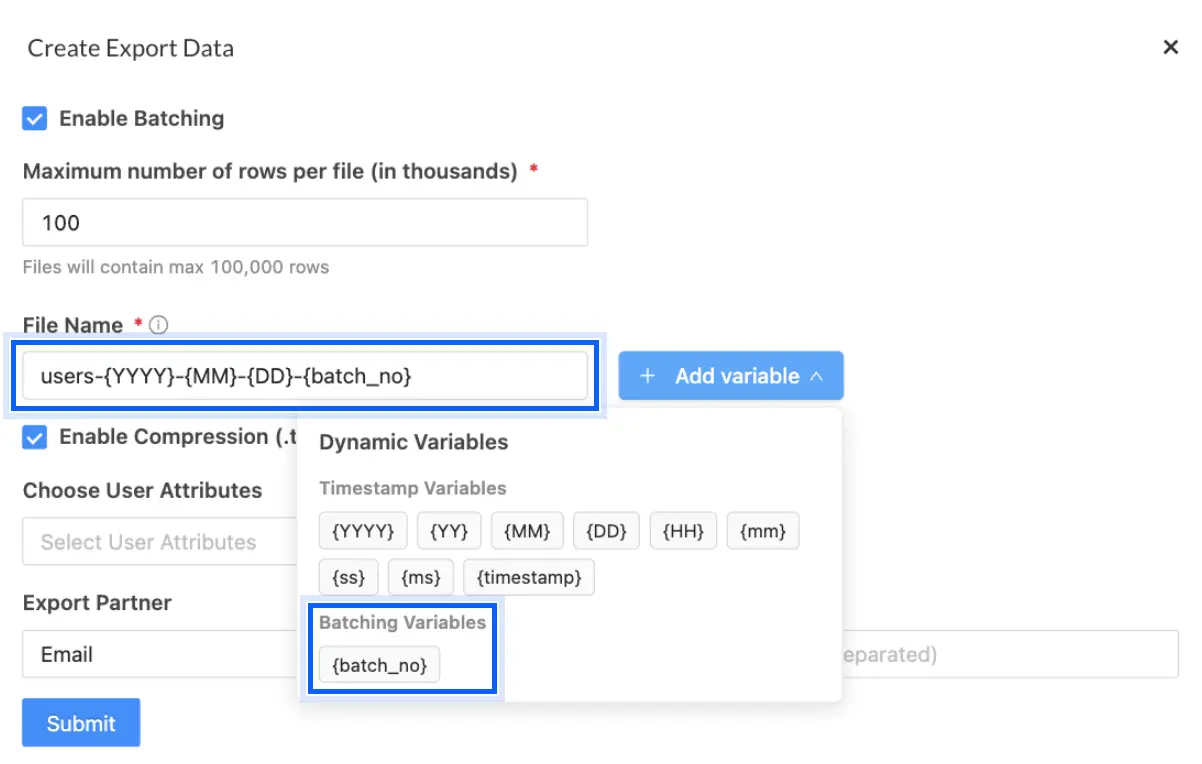
Choose whether to compress. Select Enable Compression (.tar.gz) to receive a compressed .tar.gz archive, as every export did before this release. Clear it to download the file directly without compression, ready to open with no extraction step. This option works for both - a single export or export in batches.
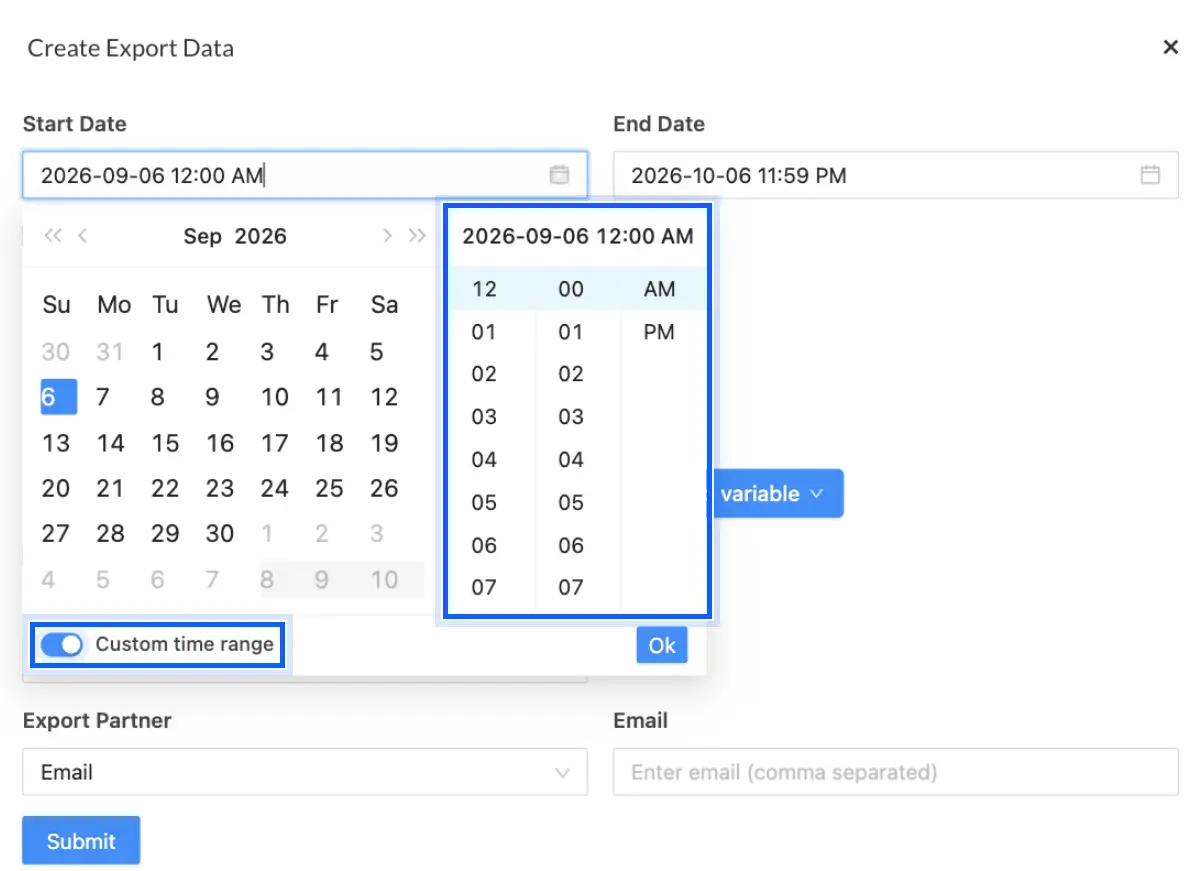
Set an exact time range. The Start Date and End Date fields now show only the date by default, where they previously showed the date with a time. To add a time, turn on the Custom time range toggle in either picker and select the hour and minute. When you turn it on, the start time defaults to 12:00 AM and the end time to 11:59 PM, so a full-day range needs no extra input.
Finish by choosing the Export Partner, adding recipients under Email (comma separated) when the partner is Email, and clicking Submit.
Example
Your finance team needs last month's order events, roughly 1.2 million rows, for reconciliation. Create an Event export for the month, select Enable Batching with 200 in the rows field, name the file orders-{YYYY}-{MM}-{DD}-{batch_no} and clear Enable Compression (.tar.gz). The team receives six plain files that open straight in a spreadsheet, each well within its row limit and each named with the date and its batch number, so nothing needs extracting or renaming before it goes into the shared drive.
Problem it solves
Exports are the last mile between NVECTA and the tools your teams work in: finance sheets, BI dashboards and data warehouses. A single oversized file breaks spreadsheet limits, generic names make files hard to trace, and a mandatory archive adds an extraction step before anyone can open the data. Predictable names, right-sized batches and a choice between compressed and plain files remove the manual cleanup and let automated pipelines pick up files by pattern.
For a full walkthrough of export types, frequencies, formats and delivery partners, see Export Users & Events guide.
Your exports now arrive named, sized and packed the way your team works with them.